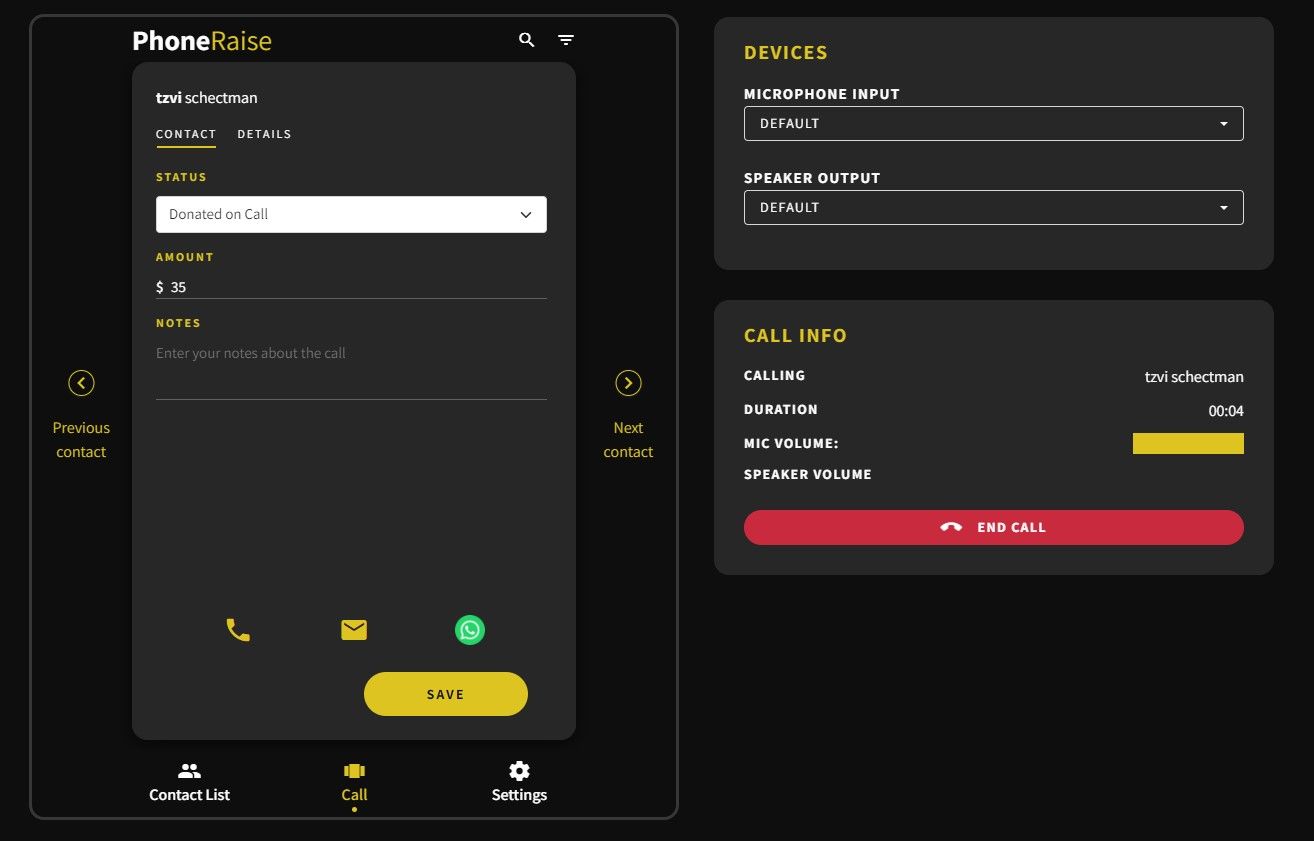
Getting Started With PhoneRaise
Welcome to PhoneRaise! This process will help you prepare for your campaign and teach you how to use PhoneRaise efficiently. Wishing you success in your campaign!
Part One: Preparation
Step 1: Fill Out the onboarding form
We need to get the details of your campaign before we get started. Please fill out this form as completely as possible.
Step 2: Prepare Your Donor Data
Preparing your donor data is critical to a successful campaign. Here are some key pointers to know when organizing your data.
Note: If you have had volunteers/ambassadors who have raised money from your donors in the past and you want those volunteers to be assigned to donors they solicited in the past make sure to read step 2.1 below.
1. Make sure you have clean data: Make sure that you have clean data when getting ready for your campaign. This includes making sure you have phone numbers for all of your donors, making sure that there are no characters in phone number fields etc. Bad data will frustrate your ambassadors, waste their time and leave money on the table.
2. First Name, Last Name Columns: Make sure you have separate columns for first names and last names. This makes it much easier to include names when sending messages and makes it easier to know who you are talking to.
3. Separate Spouses into Primary and Secondary Columns: PhoneRaise allows fields for two people per household. If your data displays as David & Jennifer Smith you will not know whose phone number is whose.
Data Template
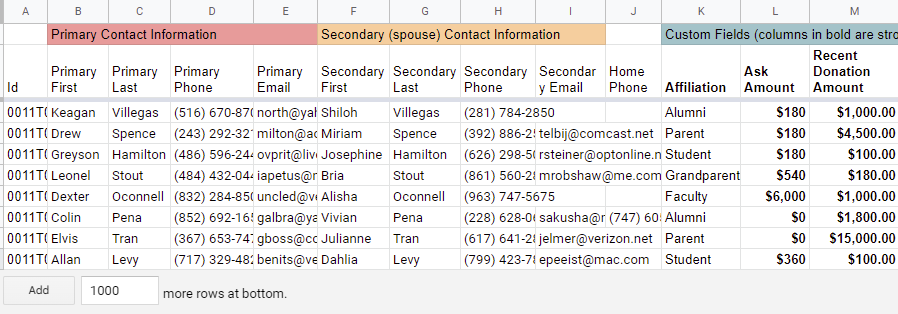
To make it easier for you to prepare your data we have provided a template you can use. The most important columns to have are:
Required Fields:
- Primary First Name
- Primary Last Name
- Primary Mobile Number
- Primary Email
Strongly Recommended Fields:
- Secondary First Name
- Secondary Last Name
- Secondary Mobile Number
- Secondary Email
- Home Phone
- Donor ID
Suggested Fields:
- Ask Amount
- Amount donated last year (or in the last campaign)
- Affiliation (student, alumni, faculty, supporter,etc)
Other Custom Fields:
Any other custom data (up to 20 fields) can be brought into PhoneRaise as well. Common custom fields include donor notes, past donor history and address information.
Step 2.1: Pre-assigning volunteers/ambassadors
Some organizations have volunteers or ambassadors that have solicited gifts from donors in previous years. If you would like those volunteers to be assigned to the donors they have solicited in previous years you will need to pre-assign those volunteers to the donors in the spreadsheet (if you don't you can skip this step).
How to pre-assign volunteers/ambassadors
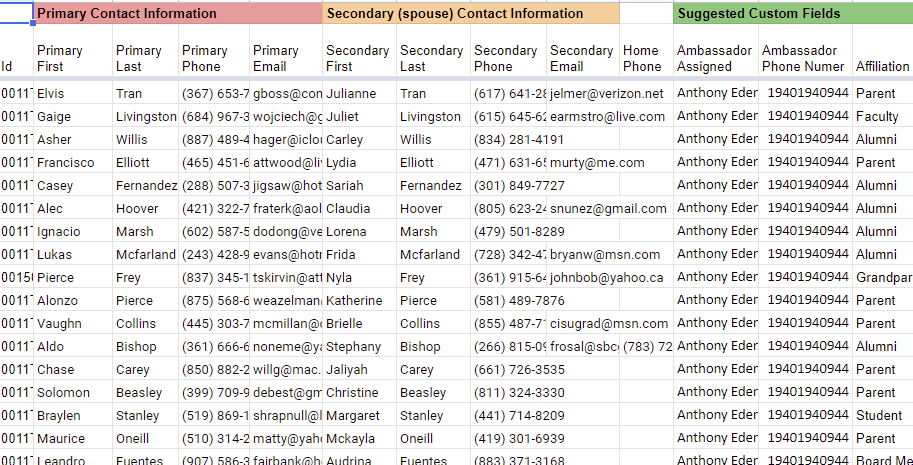
- Use this template that includes columns for the ambassador assigned and ambassador phone number.
- Add the assigned ambassador's name next to the donors they will be soliciting.
- Add the ambassador's mobile number in the ambassador phone number field. Note: In order for the pre-assignment to work the ambassador's phone number must match the ambassador/volunteer phone number displayed in the list of volunteers (see step 3 for more about uploading a list of volunteers)
Step 3: Preparing Ambassadors/Volunteers
Once you have prepared your donor data it is time to prepare a list of ambassadors/volunteers who will be contacting these donors.
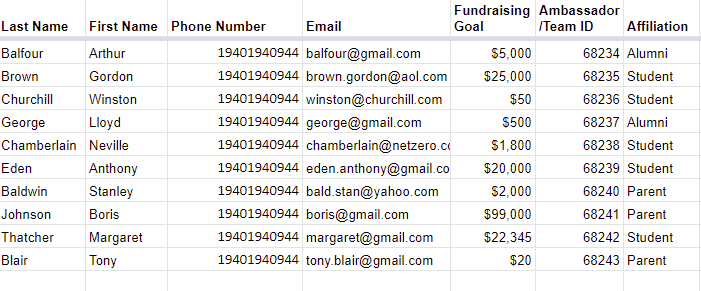
You can use this template to prepare a list of ambassadors/volunteers.
Required Fields:
- Last Name
- First Name
- Phone Number
- Ambassador/Team ID (if you are using CauseMatch)
Suggested Fields:
- Fundraising Goal
Note: If you are pre-assigning ambassadors to donors the ambassador phone number listed here MUST match the ambassador phone number listed in the donor data spreadsheet.
Step 4: Preparing Your Messaging
Take the time to prepare message templates that ambassadors can use when soliciting donations. This will enable your ambassadors to send many more messages. The following messages should be prepared
- Phone Script
- Text Message
- WhatsApp message
- Email Message (and subject line)
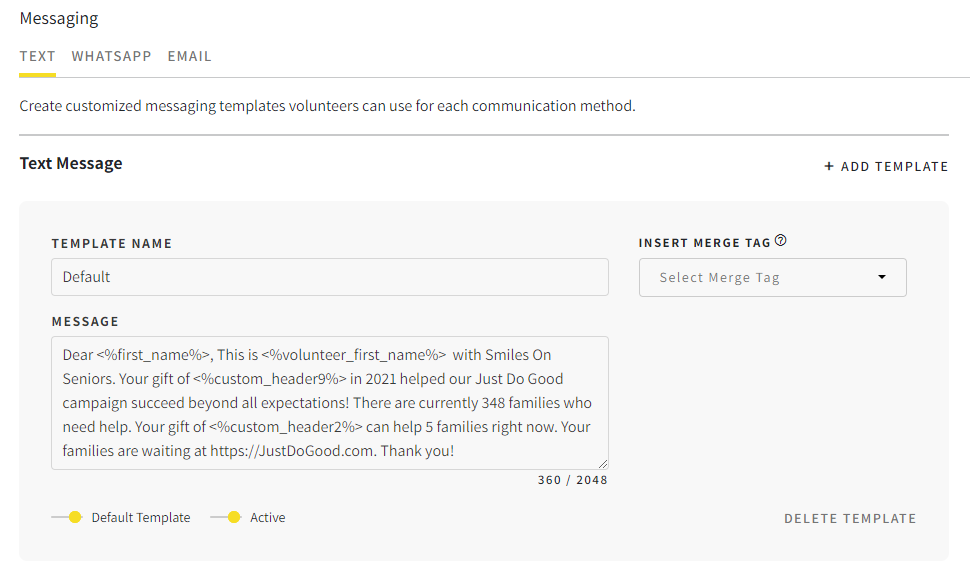
In PhoneRaise you can create multiple templates for volunteers to use when sending text messages, WhatsApp messages and emails.
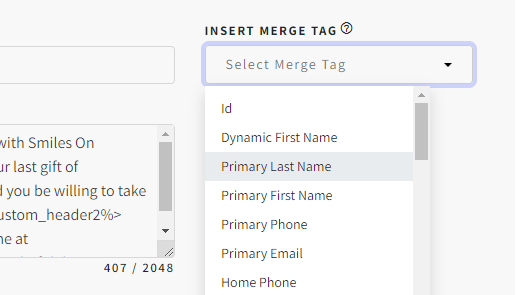
In addition, you will be able to insert personalized data (merge tags) in the messages so each message is personalized with the correct name, ask amount and any other data you would like to include.
Part Two: Setting Up PhoneRaise
Step 5: Uploading Your Data
There are two datasets you will need to upload.
1. Ambassador Data
2. Donor Data
Important: If you have pre-assigned ambassadors to donors we strongly suggest uploading your ambassador data first. When you upload your donor data afterward it will match up the ambassador phone numbers on the donor data to the ambassador numbers on the ambassador data and automatically assign them.
Uploading your data: Volunteers
1. To upload your ambassadors click on the volunteer tab in your campaign. Then Click on add volunteer and import CSV.
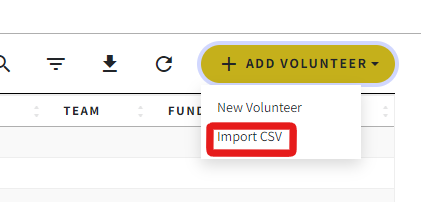
2. Click on overwrite or append (if you have no ambassadors uploaded either option will work)
3. Select your CSV file
4. Match up the data in the CSV file to the columns in the import tool
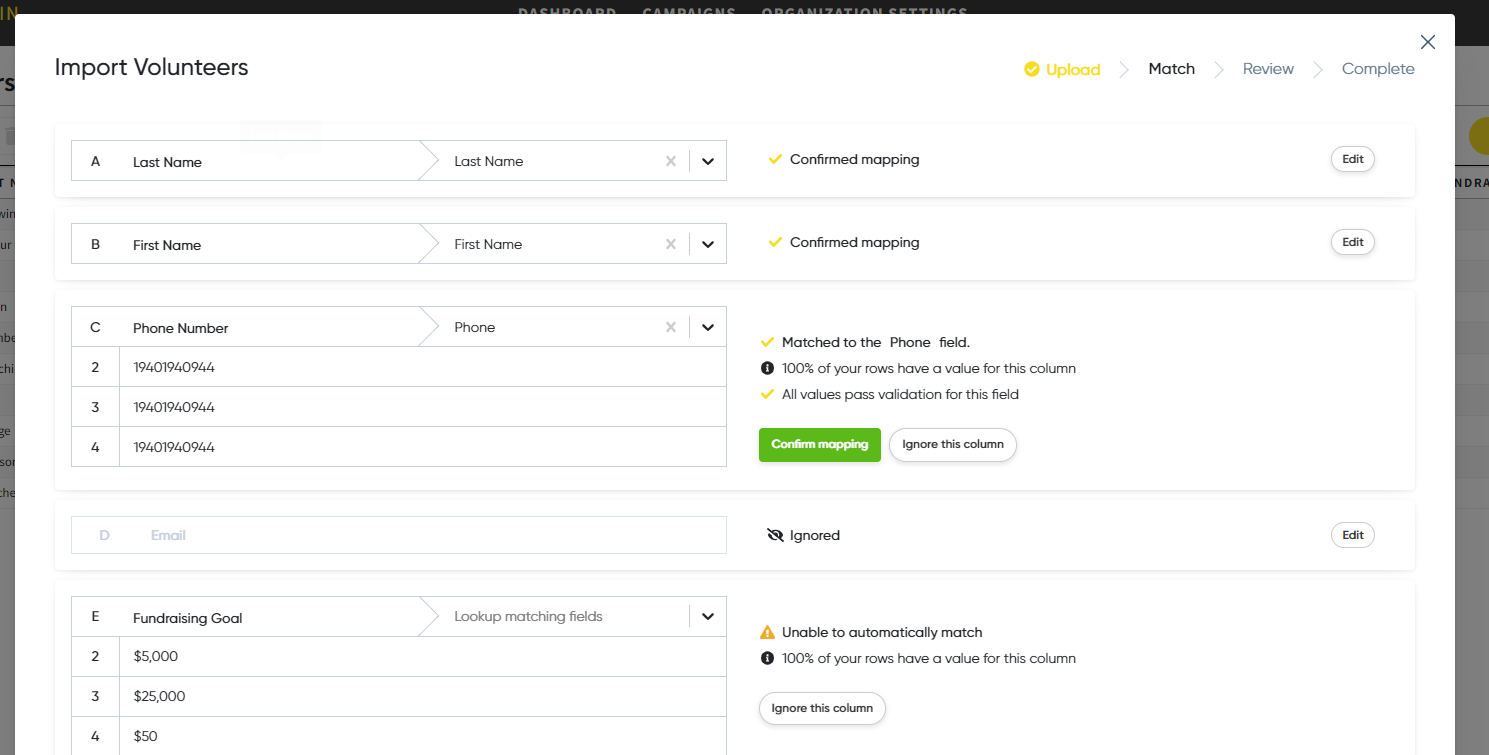
You can ignore any un-needed columns.
5. Click review and then continue.
Uploading your data: Prospects (donors)
1. To upload your ambassadors click on the prospects tab in your campaign. Then Click on add prospect and import CSV.
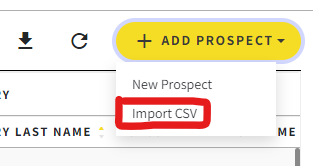
2. Click on overwrite or append
(if you have no prospects uploaded either option will work)
3. Select your CSV file
4. Match up the data in the CSV file to the columns in the import tool.
Note: Some fields are default field options and are pre-populated (First Name, Last Name, Ask Amount etc). Any other fields are called custom fields. If you do not see the name of a field in the dropdown list you can always mark it as a custom field and confirm it.
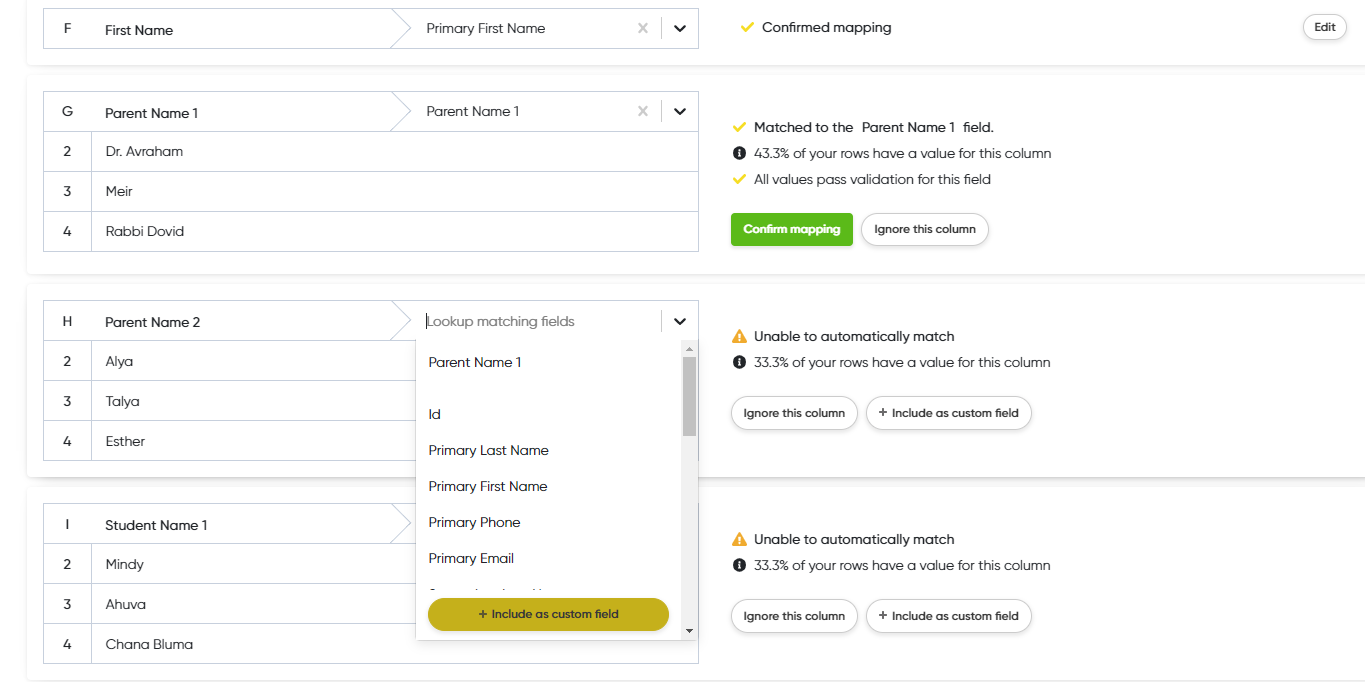
5. Click review
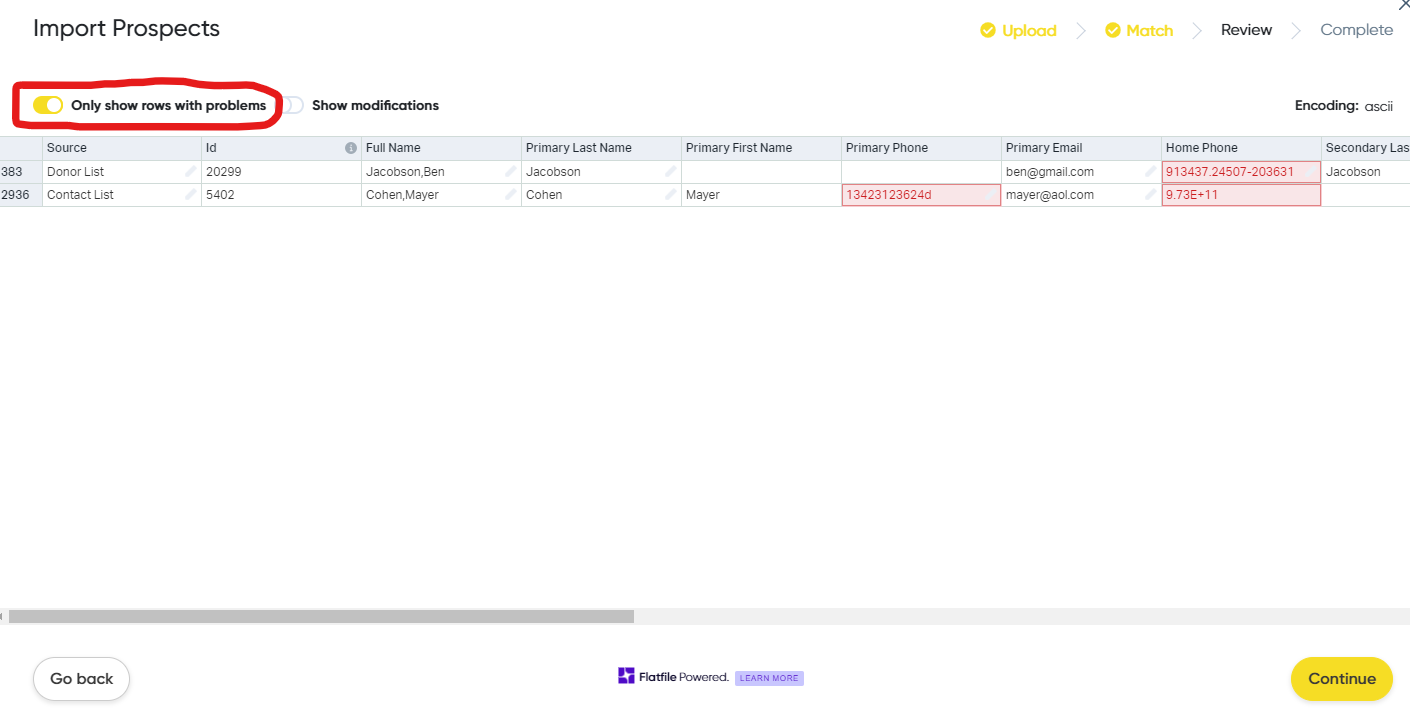
You can toggle the only show rows with problems view to edit any bad numbers before you import. Once you are finished you click continue and submit your donor data.
Step 6: Assigning Ambassadors to Prospects
In order for your ambassadors to have a list of people to reach out to you need to assign prospects to them. Assigning ambassadors can be found by clicking on the assignments tab.
If you used the pre-assignment method to match up ambassadors with prospects you can skip this step.
There are three ways to assign volunteers.
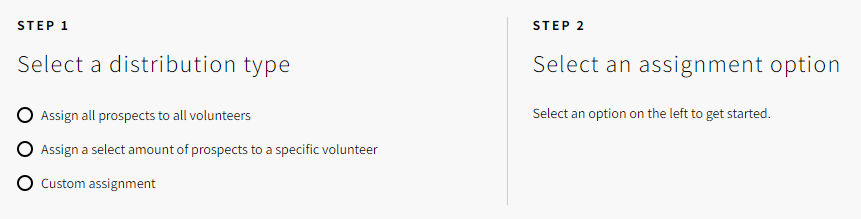
Assign All Prospects To All Volunteers
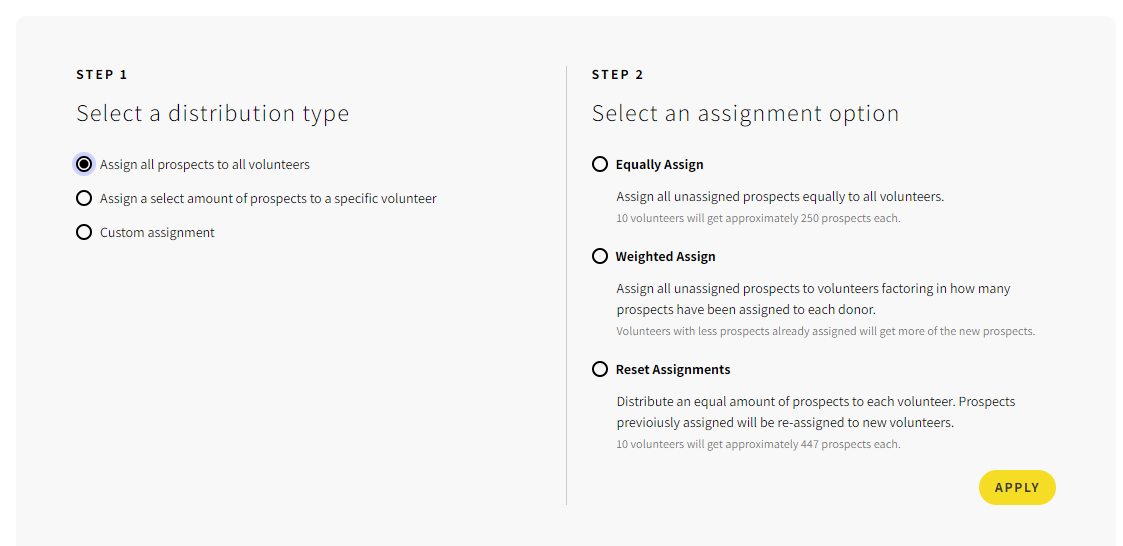
This method lets you spread out your unassigned prospects equally among all of the ambassadors. There are three variations of this method that further help with distributing prospects.
Assign A Select Amount Of Prospects To A Specific Volunteer
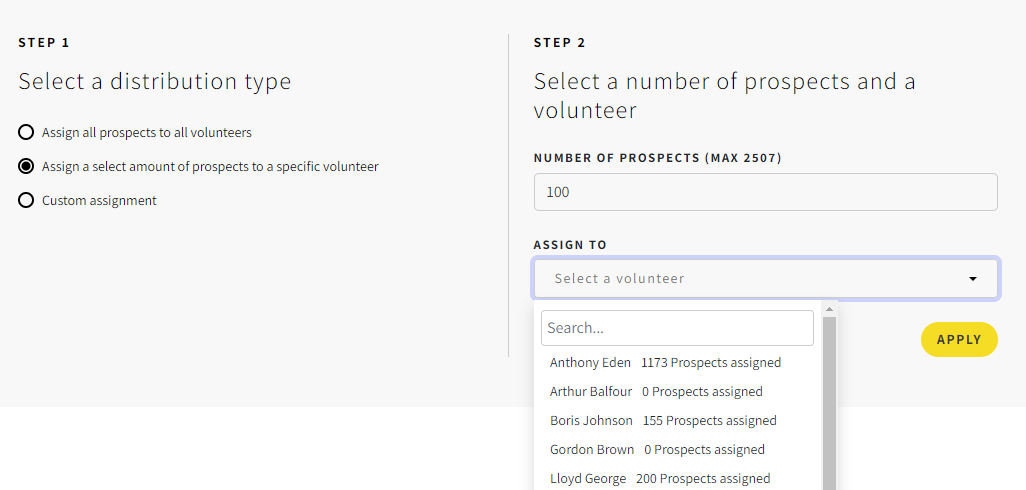
This method allows you to assign a specific amount of prospects to a designated volunteer.
Custom Assignment
Custom Assignment helps you select specific prospects based on filtered criteria and assign them to specific ambassadors. Watch the video below to learn more.
Step 7: Reviewing Campaign Settings
Watch this video for an overview of the campaign settings section.
Part Three: Using PhoneRaise
Your data is prepared, the campaign setup is complete, and it is time to use PhoneRaise!
Step 8: Sending ambassadors their prospect lists
When your volunteer and ambassador data have been uploaded and assignments completed you are now ready to send your lists to your ambassadors. Ambassadors access their lists by clicking on a unique URL that has their dedicated list.
1. Go to the volunteer tab in your campaign
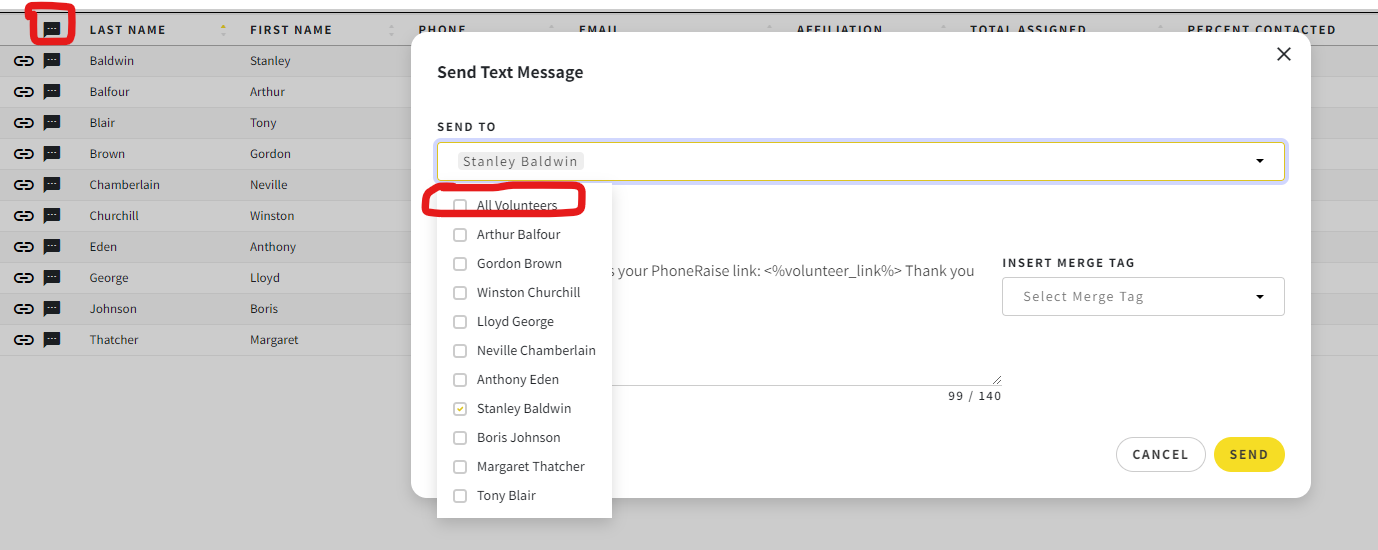
2. You will see a text message icon and paperclip next to the Ambassador's name
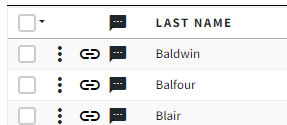
3. When clicking on the paper clip it will copy the unique URL for that ambassador's list. You can then paste that link into an email or any other channel and send the ambassador the link to their list.
4. Clicking on the text message icon will enable you to edit the message and send a text message to the ambassador with their list.
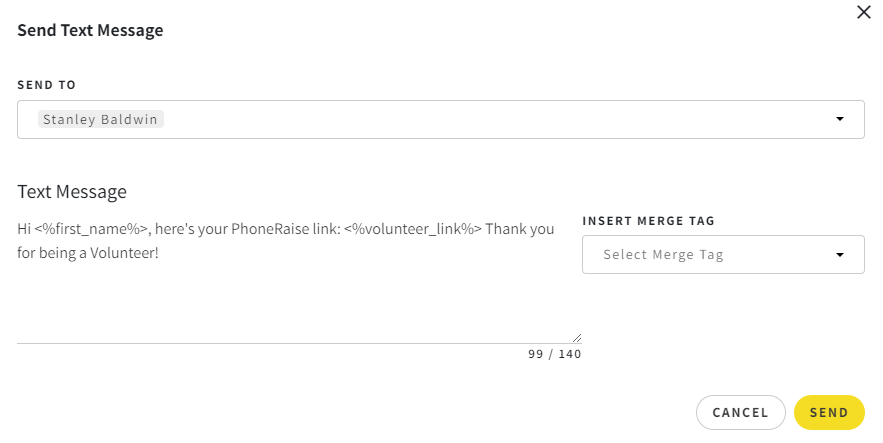
5. You can choose to send text messages to all ambassadors at once by either selecting all volunteers from the dropdown menu or by clicking on the top text message icon.
Step 9: How Volunteers Use PhoneRaise
Watch the video below to see how volunteers can use PhoneRaise once they receive their link.
PhoneRaise for Desktop:
To learn how you can use PhoneRaise on a desktop, laptop or Chromebook read the following post.
 Tzvi Schectman